Working with Resources
This article covers the following resource-management topics:
- Adding a Resource: See Adding a Resource.
- Configuring SSO Connectors: See Configuring SSO and Provisioning Connectors.
Cloning of Connectors: See Cloning of Connectors
- Adding a Bookmark: See Adding a Bookmark.
- Editing a Resource or Bookmark: See Editing a Resource/Bookmark.
- Assigning Resources or Bookmarks: See Assigning Resources/Bookmarks and Bulk-Assigning Resources/Bookmarks.
- Removing Resources: See Removing Resources.
-
Deleting Resources: See Deleting Resources.
 |
Note: Please see Syndication (opens a new article) for information about syndicating Resources. |
Adding a Resource
To add a Resource that is not already available in your Services list (see Services Section ; opens a new article), you must first activate it using the Catalog. Do this by either:
- Clicking the Add Resource button, which will take you to the Catalog screen.
- Selecting Catalog to open the Catalog screen.
Please see The Catalog Screen (opens section TOC) for detailed instruction on using the Catalog and activating Resources.
Once you have added a Resource, you must then assign it to one or more user Role(s) and/or Group(s) in order to grant them access to that Resource. See Assigning Resources/Bookmarks and Bulk-Assigning Resources/Bookmarks. If the added Resource is an SSO Connector, then you must configure it as described in Configuring SSO and Provisioning Connectors before assigning or bulk-assigning it to user Roles/Groups.
Configuring SSO and Provisioning Connectors
Resources that are SSO or Provisioning Connectors (called Product Connectors in the Services section of the Passport Configuration screen) must be configured before you can assign or bulk-assign them to one or more user Group(s) and/or Role(s).
|
|
Note: You may only configure one SSO or Provisioning Connector at a time, because each Connector uses a unique configuration. Each SSO or Provisioning Connector may only be configured once per Organization. |
To add or edit the configuration for an SSO or Provisioning Connector:
- Select Resources to open the Passport Configuration screen.
- In the Services section, click the Product Connectors link to filter the list of available Resources to show only SSO or Provisioning Connectors.
- Locate the SSO or Provisioning Connector that you want to configure, and then check the checkbox at the top left of that Resource.
- Click the Configure link at the top of the Services section.
The Properties popup for the selected SSO or Provisioning Connector appears with the Configure tab selected. The top of this screen contains the following general properties:
- Icon File Name: You can assign a custom icon to this Resource by entering the complete path to the desired icon file in this field.
- Title: You can edit the name of the Resource by entering a new name in this field.
- Use the Passport credentials: Enabling this option configures SchoolMessenger Passport to pass credentials to a Connector. If a user's SchoolMessenger Passport username and password are the same as their Connector credentials, then enabling this option eliminates the need for the user to sign in to that Resource.
- The specific properties required to configure the selected SSO or Provisioning Connectors. Each Connector has a unique set of configurable properties; however, the properties have icons next to each field. Clicking one of these icons toggles it between green (to signify that the information in that field is available to sub-Organizations of the current Organization) and gray (to signify that this information is not available to the sub-Organizations).
- The specific access privileges granted to your individual SchoolMessenger Passport account.
- Click OK at the bottom of the Properties screen to save your changes and return to the Passport Configuration screen.
Cloning of Connectors
“Clone” connector options has been added to Resources menu. It allows to configure and enable multiple instances of the same SSO connector. Each instance (clone) of the connector can be assigned with its own icon and title. Cloned connectors allow you to support multiple logins to the same product for a single end user. Cloned connectors can be exposed to Passport user roles and groups like any “original” connector.

Adding a Bookmark
A Bookmark is a URL or other Resource that is publicly available as a hyperlink to a web page. The Admin Console allows you to add a Bookmark for folders, users, Roles, or Groups within an Organization.
To add a Bookmark:
- Select Resources to open the Passport Configuration screen.
- Select the Organization for which you want to add the Bookmark using the Organization pull-down menu.
- In the Services section, click the Add Bookmark button.
The Bookmark popup appears.
- Enter a name for the Bookmark in the Bookmark Name field. This will be the name that end users see when they log into SchoolMessenger Passport.
- Enter the complete URL to the Bookmark in the URL field.
- If desired, add a 60x60 (60 pixels high and 60 pixels wide) icon to help the Bookmark stand out by clicking the Select File button to open a standard File Upload dialog that will allow you to navigate to, select, and update an image. This image can be in any popular file format (JPG, GIF, PNG, etc.). If you choose not to upload an icon, then the Bookmark will display a green pin.
|
|
Note: If the selected icon file is a different size, then SchoolMessenger Passport will scale/distort the image to fit the available 60x60 space. |
- Click OK to finish adding the Bookmark.
The new Bookmark will appear in the Services section of the Passport Configuration page.

Editing a Resource/Bookmark
To edit a Resource or Bookmark:
- Select Resources to open the Passport Configuration screen.
- Select the Organization for which you want to edit the Resource/Bookmark using the Organization pull-down menu.
- In the Services section of this screen, locate the Bookmark that you want to edit, and then check the checkbox at the top left of that Bookmark.
- At the top of the Services section, click the Configure link.
The Properties popup appears with the current information for the selected Resource/Bookmark.
- Make any necessary changes, and then click OK to save those changes and return to the Passport Configuration screen.

Assigning Resources/Bookmarks
SSO Connector Resources must be configured before you can assign them to a user Group/Role. See Configuring SSO and Provisioning Connectors. To assign one or more Resource(s) and/or Bookmark(s) to one specific user, Role, or Group within the Organization:
- If the Resource(s) or Bookmark(s) being assigned include one or more application(s) (such as a mobile app), then you must first create a folder for the user, Role, or Group within the Organization that will be receiving access to the Resource(s) or Bookmark(s). See Adding Folders (opens a new article).
- Select Resources to open the Passport Configuration screen.
- Select the Organization for which you want to add the Resource(s) or Bookmark(s) using the Organization pull-down menu.
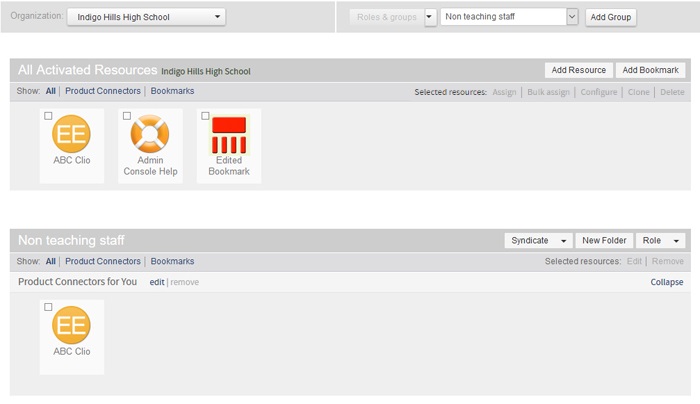
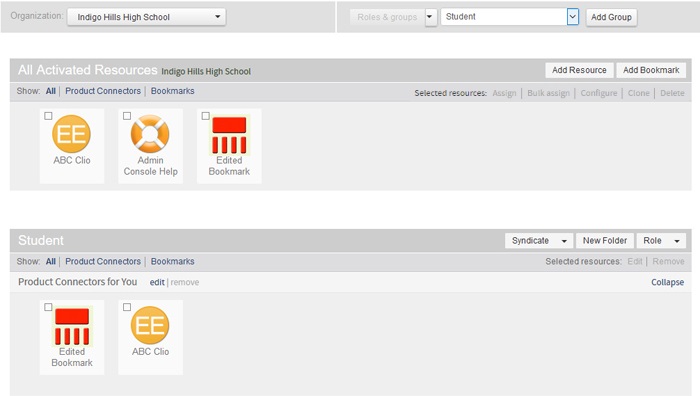
- Select the user, Role, or Group to which you want to assign the Resource(s) or Bookmark(s) using the User Roles & Groups pull-down menu. If needed, you may create a custom Role or Group (see Creating Roles and Creating Groups ; links open new articles).
The Services section of the Passport Configuration page will now display the selected Organization, and the Group/Role section will display the selected user, Role, or Group and the folders/Resources available to those users.
- In the Services section of this screen, locate the Resource(s) or Bookmark(s) that you want to assign, and then either:
- Click and drag the selected Resource from the Services section to the Group/Role section, or
- Proceed to Step 6.
- Check the checkbox(es) at the top left of the Resource(s) or Bookmark(s). If needed, you may click one of the Show links to filter the list of Resources/Bookmarks by type, to help you find the Resource(s) or Bookmark(s) that you are looking for.
- To assign the selected Resource(s) or Bookmark(s) to a single user Role or Group, click the Assign link. To bulk-assign the Resource(s) or Bookmark(s) to multiple user Roles/Groups, see Bulk-Assigning Resources/Bookmarks.
The Assign Resources popup appears.
- Use the Place to Folder pull-down menu to select the folder in which the Resource will be [;aces.
- Click OK to finish assigning the Resource(s).
The selected Resource(s) or Bookmark(s) appear in the Group/Role section of the Passport Configuration screen in the specified folder.
Individual end users or end users who belong to the selected Role or Group will now be able to access and use the assigned Resource(s) when they log into SchoolMessenger Passport.
Bulk-Assigning Resources/Bookmarks
SSO Connector Resources must be configured before you can bulk-assign them to user Groups/Roles. See Configuring SSO and Provisioning Connectors. To bulk-assign one or more Resource(s) and/or Bookmark(s) to multiple user Roles and/or Groups within the Organization:
- If the Resource(s) or Bookmark(s) being assigned include one or more application(s), such as a mobile app, then you must first create a folder for the user, Role, or Group within the Organization that will be receiving access to the Resource(s). See Adding Folders (opens a new article).
- Select Resources to open the Passport Configuration screen.
- Select the Organization for which you want to add the Resource(s) using the Organization pull-down menu.
The Services section of the Passport Configuration page will now display the selected Organization, and the Group/Role section will display the selected user, Role, or Group and the folders/Resources available to those users.
- In the Services section of this screen, locate the Resource(s) or Bookmark(s) that you want to add, and then check the checkbox(es) at the top left of the Resource(s) or Bookmark(s). If needed, you may click one of the Show links to filter the list of Resources by type, to help you find the Resource(s) or Bookmark(s) that you are looking for.
- To bulk-assign the selected Resource(s) or Bookmark(s) to a single user, Role, or Group, click the Bulk Assign link. To only assign the Resource(s) or Bookmark(s) to a single user Role or Group, see Assigning Resources/Bookmarks.
The Bulk Assign Resources popup appears, displaying each of the Role(s) and Group(s) within the selected Organization.
- Check the checkbox(es) next to the Role(s) and/or Group(s) to which you want to assign the selected Resource(s) or Bookmark(s). The Bulk Assign Resource popup displays each of the items being assigned to each Role/Group when you select or unselect a Role or Group.
|
|
Note: If one or more of the selected Resource(s) or Bookmark(s) requires a user Role or Group to have a folder and that Role or Group does not have a folder, then the notation Create folder for assigning will appear for the affected Role(s) and/or Group(s). See Adding Folders (opens a new article) for instructions on creating folders. |
- For each selected Role and/or Group, use the Assign to Folder pull-down menu to choose the folder within which to place the assigned Resource(s) or Bookmark(s), and then click OK.

The selected Resource(s) or Bookmark(s) appear in the Group/Role section of the Passport Configuration screen in the specified folder. You may use the User Roles & Groups pull-down menu at the top of the Passport Configuration screen to select each affected user Role/Group to see the Resource(s) or Bookmark(s) that you just assigned.
End users who belong to the selected Roles and/or Groups will now be able to access and use the bulk-assigned Resource(s) when they log into SchoolMessenger Passport.
Removing Resources
Remove a Resource when one or more of the user Groups and/or Roles no longer needs access to that Resource. The Resource remains activated; if it is a paid Resource and your Organization has a Standard subscription, then the Resource still counts toward your limit of five (5) paid Resources.
To remove a Resource:
- Select Resources to open the Passport Configuration screen.
- Use the Organization and User Roles & Groups pull-down menus to select the specific user Group/Role from which to remove the Resource.
- In the Group/Role section, locate the Resource(s) that you want to remove, and then check the checkbox(es) at the top left of the Resource(s).
- Click the Remove link.
The Confirm popup appears.
- Click OK to confirm the removal.
Deleting Resources
Deleting one or more Resource(s) permanently removes the selected Resource(s) from the Passport Configuration screen. The affected Resource(s) can no longer be accessed by any users. This is a permanent action. If it is a paid Resource and your Organization has a Standard subscription, then deleting the Resource no longer counts it toward your limit of five (5) paid Resources.
To permanently delete one or more Resource(s):
- Select Resources to open the Passport Configuration screen.
- In the Group/Role section, locate the Resource(s) that you want to delete, and then check the checkbox(es) at the top left of the Resource(s).
- Click the Delete link.
The Confirm popup appears.
- Click OK to confirm the deletion.
 |
CAUTION: DELETING A RESOURCE A PERMANENT ACTION AND CANNOT BE UNDONE. IF YOU DELETE A RESOURCE IN ERROR AND NEED THAT RESOURCE RESTORED, YOU WILL NEED TO RE-ACTIVATE AND REASSIGN THAT RESOURCE FROM SCRATCH. |